


I'd like to introduce you to my latest kit. A medium-sized boxy with a zip closure that can be worn with a range of different leather or webbing straps. This bag is based on a classic camera bag style.
This is the perfect you-made bag for keeping all your key belongings safe and close to your body.
How to make a zip closure leather bag
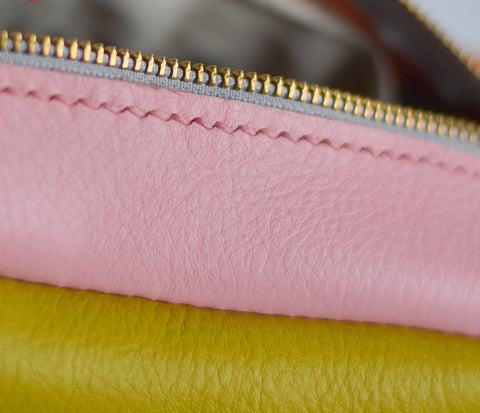
This is my most challenging kit. In a good way! This make involves learning how to sew leather together using traditional saddle stitch. With two specialist saddlers needles at either end of a length of thread, you'll learn how to feed both needles through the same hole from different sides of the leather. Perfecting this stitch takes a little practice. Once you've mastered saddle stitch (2 scraps of leather with stitch holes are included in this kit for you to practice on before launching yourself at the actual bag!) you'll find that the repetitive actions are very meditative and calming. This isn't a quick afternoon make like my other kits - spend your time stitching this bag - truly slow crafting! The stitching you are aiming to create is slanted or diamond shaped. You will learn how to insert the needles in a specific order and placement within the slots of the stitching holes to nudge the thread into this diamond shape. It's a lot easier when you use a stitching pony.
What is a stitching pony?
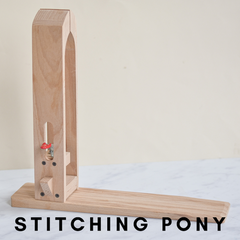
This nifty little device is called a stitching pony. It clamps your leather pieces in place freeing up your hands so that you can concentrate on perfecting your saddle stitch. It's very hard to achieve even tension on your stitches without one. This one has been chosen due to its wide reach and quick release lever.
What can you use instead of pins to secure the pieces of leather together?
When sewing with fabric, pieces of material are secured together with pins before sewing. You can't do this with leather - it's too tough and thick for pins to penetrate! In this kit, you'll have bulldog clips and extra sticky double sided sticky tape to secure the pieces together before you sew them together.
What's in this kit?
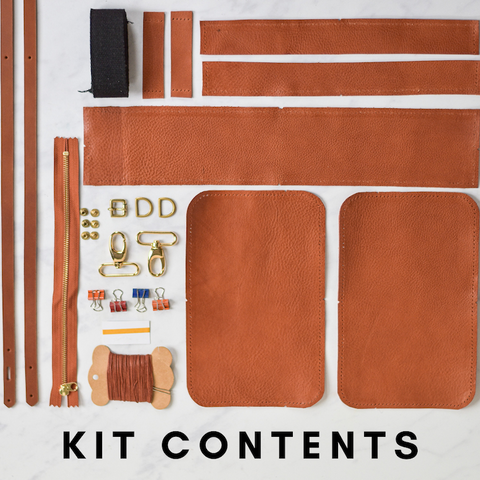
* Pre-cut leather with stitch holes pre-punched in your choice of colour/s
* Specialist recycled nylon leatherworkers thread to match the leather
* Two leatherworkers saddlers needles
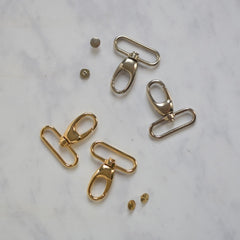
* Brass or chrome zip in your choice of fabric colour
* Brass or chrome D rings, buckles, tri-bar sliders and trigger hooks
* Super sticky double sided tape to hold your zip and lining in place
* Bulldog clips to hold the leather in place for stitching
* Leather and/or webbing strap in range of colours and patterns
* Add on to choose multiple strap options
* Personalise your bag with your name or initials
* Extension to add on a lining with a zipped inner pocket - you can choose to have the lining pre-cut and prepped or cut the lining from the pattern and use your own fabric!
* Option to add on a stitching pony that frees up your hands and makes mastering saddle stitch much easier
Dress your bag up or down with a range of colourful patterned webbing straps
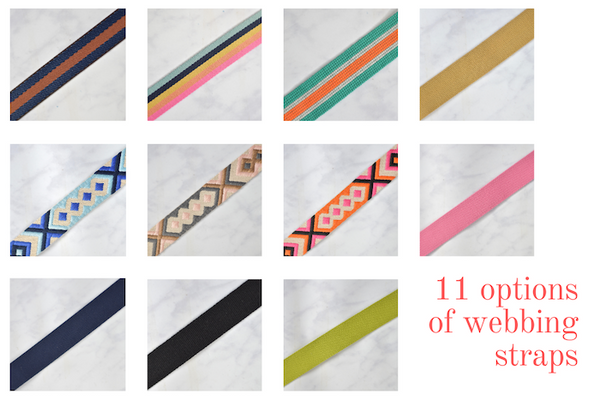
All the webbing strap and leather strap options come with trigger hooks, buckles and tri-bar sliders to make them easily adjustable lengthwise. The trigger hooks are quick release so you can easily swap straps according to your mood or outfit!!
Are you a brass or chrome metal fittings kind of person?
For this kit, you'll get to choose either solid brass or chrome zips, buckles, tri bar sliders, D rings, trigger hooks and screw in rivets. Usually, I've only offered solid brass but during my in person workshops, a few people have requested chrome coloured metalware. I'm really pleased to offer the choice so that you can further customise your bag!
I've never made anything like this or worked with leather before - can I do it?
Short answer is yes!
The long answer is absolutely, as long as you spend a little time really absorbing the guide to saddle stitch in the online video tutorial and practice until you are confident you've mastered the diamond stitch effect on both sides (this is key - it's often easy to get the stitches into the desired slant on one side of the leather whilst the underside is all over the place). In the supporting video tutorials I'll show you how to achieve even-slanted stitches on both sides. A stitching pony will be indespensable in helping you achieve beautiful stitches. Another thing that will help you get a perfect-looking bag is using the sticky tape to fix the zip on so that it lies flat to the leather and not warped.
The addition of lining is for those wanting to dive in deeper to bag making and challenge themselves a little more. It's designed to be sewn on a domestic sewing machine. If you sew in lining, the steps to making your bag will be in a different order (especially when it comes to stitching the main zip to the leather opening). This is all demonstrated clearly in the additional tutorial you'll get access to when you buy the lining pattern extension or pre cut lining option.
Why do you only have one option for lining fabric?

Can't I cut the leather and make the stitch holes myself?
I thought very long and hard about whether to offer this kit with the tools and pattern and blank piece of leather for you to cut out the pieces and then use the tools to punch out the stitch holes yourself. It's definitely something I may offer in the future.
However, tools all add on cost to the kits and you would need to have a special mallet, heavy nylon punching block and good quality diamond stitch punches to make the holes. You'd also need to make sure you get the same amount of holes on the front and back panels as you do on the all round gusset piece - every stitch hole has to line up otherwise the bag will look all wonky and skewed. The more accurate the stitch holes, the better the outcome will be. I wanted to make this bag as failsafe for beginners as possible - I want you to be happy with the bag you make and proud to wear it!
Why are the kits on pre order?
Pre ordering enables me to order in exactly the right amount of each material that you order. So that I can order exactly the right amount of chrome tooth zips in kiwi for example. Not over ordering the wrong colour or type means that I won't be left with excess materials - reducing waste. The zips are also made to order for you by YKK - this takes 4 weeks from placement of the order. I've tried to time this kit so that it will reach you in plenty of time for Christmas (in case you've been lucky enough to be gifted a kit, or you are giving it to a loved one!).
The bag measures 25cm (9.8") wide by 15cm (5.9") high by 8cm (3") deep.
1 comment
These are really great Q&As, thank you! x